WordPress, the widely popular content management system, is known for its simplicity and ease of use. However, for those who are new to the platform or even for seasoned users, certain tasks might require a little guidance.
Publishing draft pages in WordPress is one such task. In this step-by-step tutorial, we’ll cover how to publish your draft pages in WordPress efficiently.
What are Draft Pages in WordPress?
Drafts are unpublished pages or posts that are saved on your WordPress dashboard. They allow you to work on content over time and make it public only when you’re ready.
This feature is useful for preparing content in advance or if you need to get approvals before making it live.
How to publish draft pages in WordPress?
To publish draft pages in WordPress follow these simple steps:
- Log In to Your WordPress Dashboard
- Locate Your Draft Pages
- Review Your Draft
- Publish Your Draft
- Confirm Page Publication
Step 1: Log In to Your WordPress Dashboard
To publish a draft page in, you’ll first need to log into your WordPress dashboard. This is where all the content creation and site management happens. Simply enter your username and password on the login page to get started.
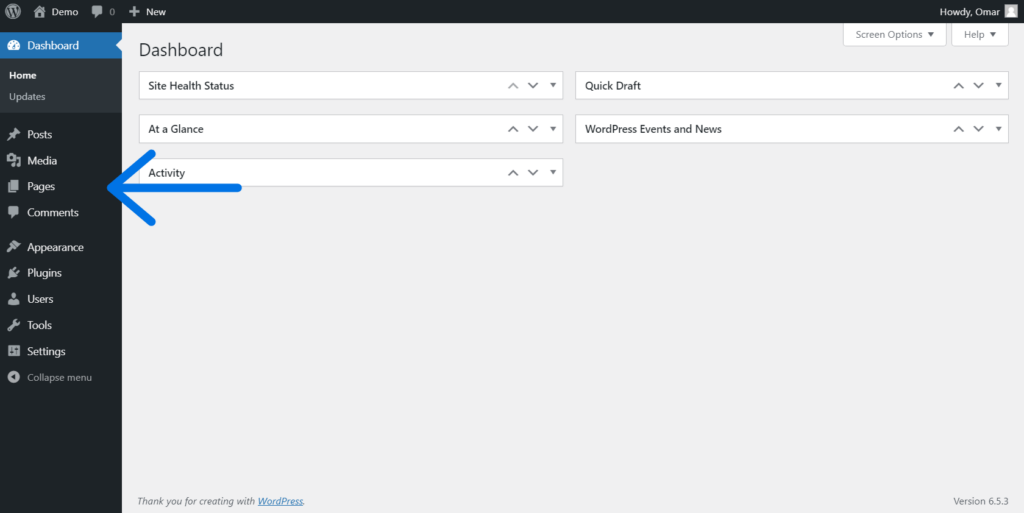
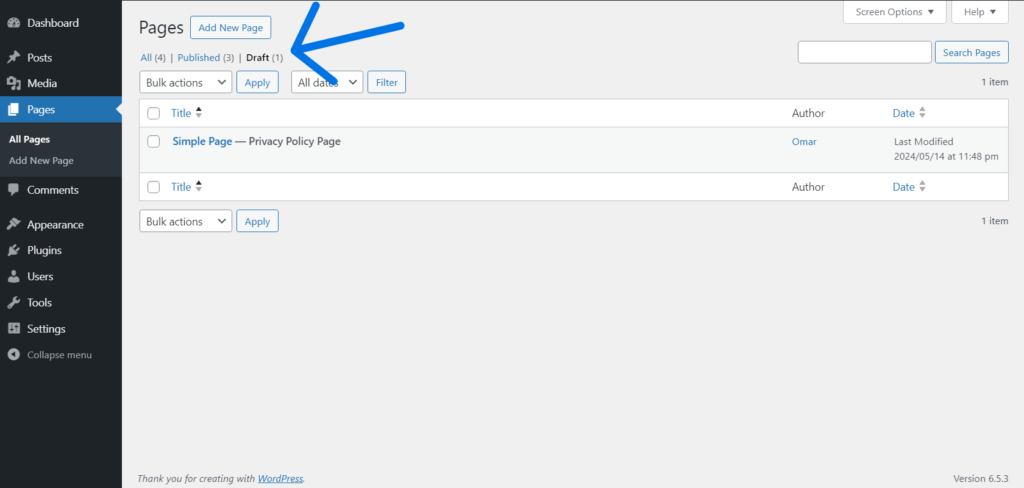
Once logged in, click on the ‘Pages‘ option on the left-hand side menu. This will show you a list of all the pages your site currently has, including those published, scheduled, and saved as drafts.
Step 2: Locate Your Draft Pages
In the Pages section, you’ll find a few tabs such as ‘All’, ‘Published’, ‘Drafts‘, and ‘Trash’. Click on the ‘Drafts‘ tab to view all the pages you’ve saved as drafts.
Locate the draft page you wish to publish and click on the title to open it.
Step 3: Review Your Draft
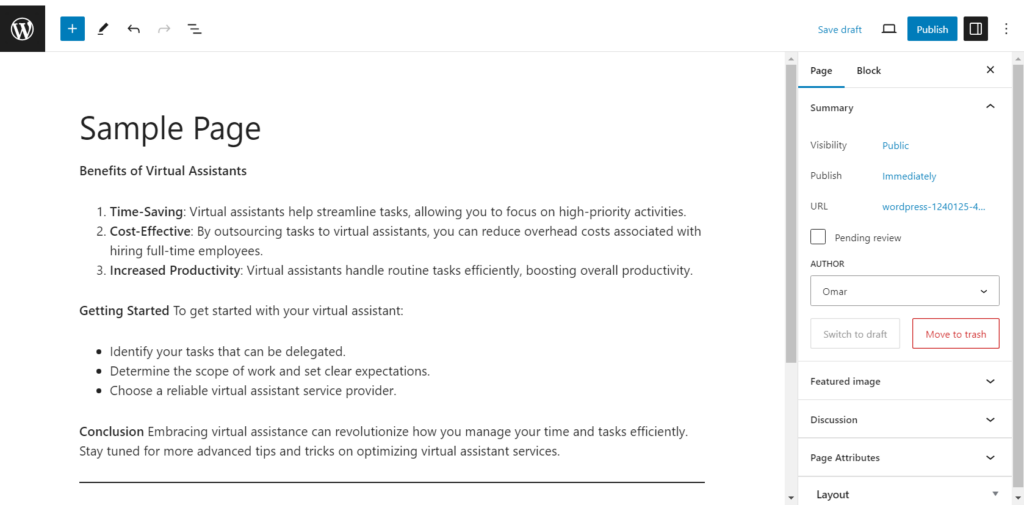
Before publishing, it’s important to review your draft to ensure everything is as you want it to be. Check the content, On-page SEO, or formatting issues, and make sure all images and links are working correctly.
Step 4: Publish Your Draft
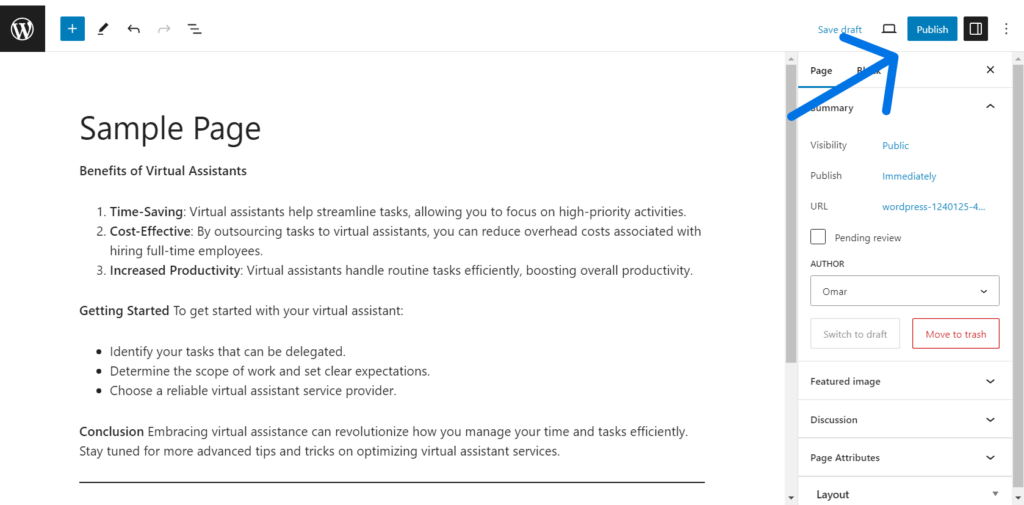
Once you’re satisfied with the review, look for the ‘Publish‘ box usually found on the right side of the screen when editing the page. Here you will see the ‘Publish’ button. If you’re ready for the page to go live immediately, simply click this button.
or Scheduling Your Page
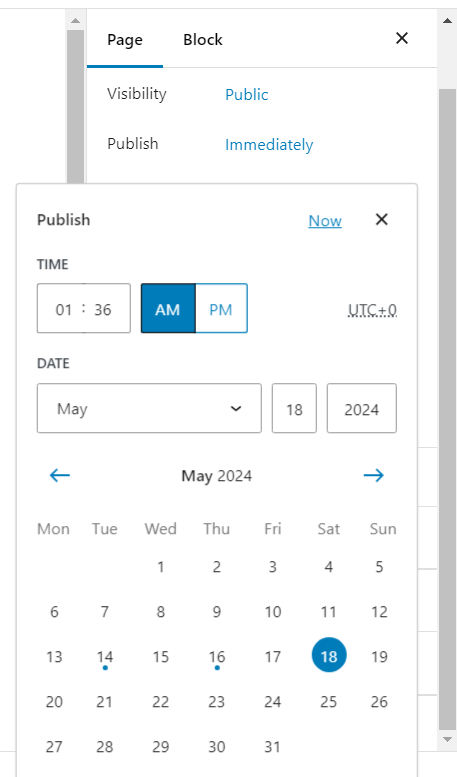
If you prefer to schedule the page to be published later, under the ‘Summary’ drop-down menu click on the ‘immediately‘ link next to ‘publish’, then select a date and time for the page.
Step 5: Confirm Page Publication
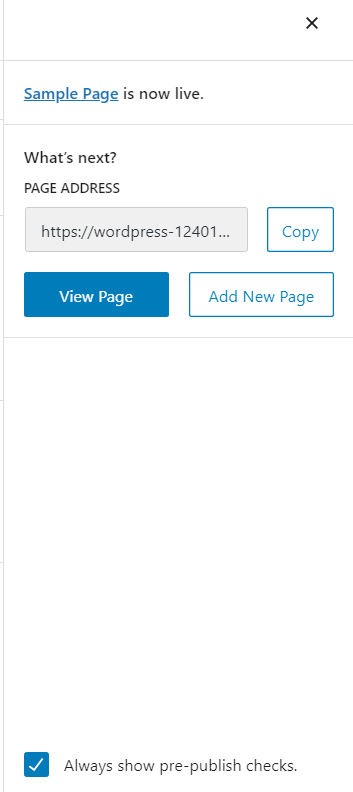
After clicking ‘Publish’ or ‘Schedule’, WordPress will confirm that your page is live or scheduled. You can visit your site to see the page in action or check the ‘All’ tab under Pages to see it listed among the other published pages.
Conclusion
Publishing draft pages in WordPress is simple and straightforward once you know where to look and what buttons to click.
Whether you’re ready to go live immediately or scheduling for a later date, the process is designed to be user-friendly. Remember to always review your content thoroughly before making it public to maintain a professional and polished website.
If you encounter any issues or need further assistance, the WordPress community and support forums are excellent resources for troubleshooting.
Have you found this tutorial helpful? Are there other WordPress tips you’re eager to learn? Share your thoughts in the comments below.

